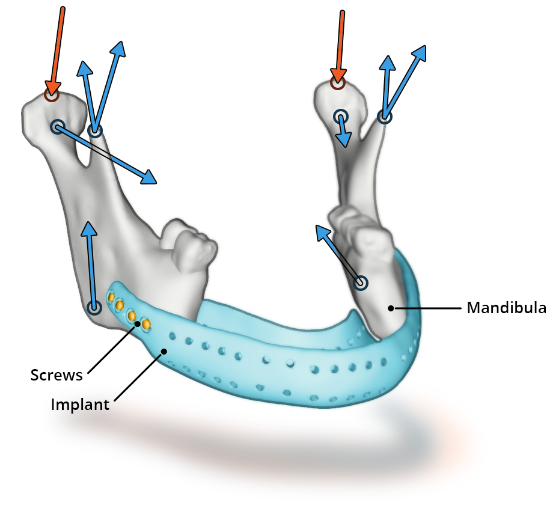
Regardless of the implant type, the patient geometry and implant geometry are first positioned (registered) in relation to each other. This is done via a few predefined points (landmarks) where the software assists. The patient-specific situation created in this way is extended by likewise predefined load scenarios so that the actual testing can take place by means of simulation.
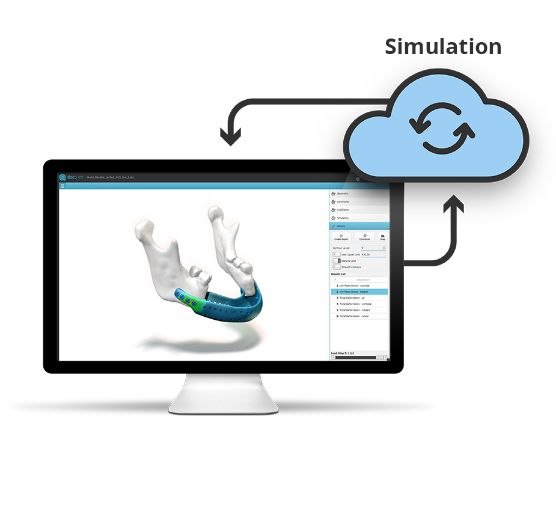
The actual simulation takes place in the background via direct connection to a cloud-based ANSYS calculation environment or alternatively customer-owned infrastructures. ANSYS is the world market leader in the field of numerical simulation and an industrial standard. Data transmission is always encrypted and complies with medical security requirements. Within docq, all this is just a push of a button.
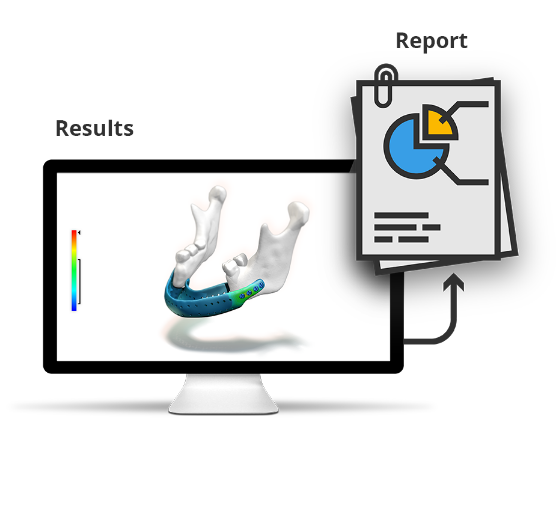
The simulation results are visualized in Simq in the form of a comparison of different restorations for the patient, enabling the selection of the optimal implant design in conjunction with maximum safety and strength. Based on the comparable inputs, an FDA-compliant (Guideline 1807) report can be generated for the technical documentation, which can be customized.